목록분류 전체보기 (121)
개발공부일지
 React - learn - Updating Objects in State, Updating Arrays in State (객체, 배열로 상태 업데이트하기)
1. Updating Objects in State (마우스 포인터) https://react.dev/learn/updating-objects-in-state import { useState } from "react"; export default function MovingDot() { const [position, setPosition] = useState({ x: 0, y: 0, }); return ( { setPosition({ x: e.clientX, y: e.clientY, }); }} style={{ position: "relative", width: "100vw", height: "100vh", }} > ); } - 상태를 읽기전용으로 처리 - 새로운 객체를 만들어서 설정함수에 전달해서 다시..
https://react.dev/learn/queueing-a-series-of-state-updates 1. 요청 카운터 수정하기 - 카운터를 늘리거나 줄이는 클릭중에 결정된 구체적인 값("pending") 으로 설정하면 업데이트를 할수있다! async function handleClick() { setPending((p) => p + 1); await delay(3000); setPending((p) => p - 1); setCompleted((c) => c + 1); } - 클릭했을때 pending 상태값에 +1 (현재 pending 상태값에 이전값인 p를 이용해서 업데이트) - delay함수로 3초를 기다림 - 3초가 경과하면 setPending로 pending 상태값에서 -1 - setCompl..
https://react.dev/learn/reacting-to-input-with-state# Reacting to Input with State – React The library for web and native user interfaces react.dev 1. input 상태에 따라 시각적으로 상태 식별하기 - 비어있는지, 입력중인지, 제출하는지, 성공했는지, 오류인지를 시각적으로 나타내주 import { useState } from "react"; export default function Form() { const [answer, setAnswer] = useState(""); const [error, setError] = useState(null); const [status, setStat..
Passing Props to a Component https://react.dev/learn/passing-props-to-a-component Passing Props to a Component – React The library for web and native user interfaces react.dev props 전달하기!!! import { getImageUrl } from "./utils.js"; function Profile({ person, size = 80 }) { const imageSrc = getImageUrl(person); return ( {person.name} Profession: {person.profession} Awards: {person.awards.length} ..
목차 1. react router dom 2. BrowserRouter 3. Routes, Route 4. Link 1. react router dom - 설치하기 npm install react-router-dom@6 2. BrowserRouter // index.js import { BrowserRouter } from "react-router-dom"; const root = ReactDOM.createRoot(document.getElementById("root")); root.render( ); 3. Routes, Route - 위치가 변경될때마다 의 하위경로를 찾아 일치하는 항목을 랜더링해준다. // app.js import { Routes, Route } from "react-router-d..
 React - Tutorial : Tic-Tac-Toe
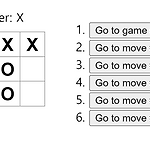
목차 1. 리액트 튜토리얼 따라하기 2. Lifting state up 3. immutability (불변성) 4. Winner 설정 5. Time Travel 6. Picking a Key 7. 완성코드 1. 리액트 튜토리얼 따라하기 https://react.dev/learn/tutorial-tic-tac-toe https://codesandbox.io/p/sandbox/exciting-rubin-5clxn7?file=%2FApp.js%3A1%2C1-151%2C1 2. Lifting state up export default function Board() { const [squares, setSquares] = useState(Array(9).fill(null)); function handleClick..
 React - class component, function component
목차 1. component 2. class component 3. function component 4. 함수형 컴포넌트 활용해보기 1. component - 컴포넌트 단위는 UI단위 - 재료를 만들어서 레이아웃 단위로 컴포넌트를 구상해서 - 하나의 컴포넌트에 조립하면 페이지가 구성되는것! - 만약 버튼을 컴포넌트로 구상을 해서 만든다고 했을때 - 확인, 취소 버튼이 필요하다면 내용물을 바꿀수있어야하니까 - props값이 내용을 다르게 보여줄수있게 해주고 - state는 모든 버튼의 최초의 상태값! (해당 컴포넌트만 가지고있는 본인의 상태값) 2. class component - 클래스형 컴포넌트는 빌드된 내용이 무겁고 this 바인딩 문제가 있다 - Mycom을 만들어 Mypage에서 import해서..
목차 1. babel 사용법, 환경 설정, 실행 2. babel 변환 3. webpack 속성 4. webpack 설정 & 실행 5. react 실행, 에러 1. babel 사용법, 환경 설정, 실행 - babel은 자바스크립트 코드를 변환해준다. - commonjs와 ES6문법 전환을 해주어 최신 문법으로 작성하면서 작업을 할수있다는 장점이 있다! - npm 설치하기 npm install @babel/core @babel/cli @babel/preset-env - .babelrc 파일만들고 환경 구성해주기 { "presets": [ [ "@babel/preset-env", { "targets": { "node": "16", "chrome": "58", "ie": "11" } } ] ] } - 자바스크립..
 React - 리액트, 특징, component, JSX
목차 1. 리액트 탄생배경 2. 리액트 특징 ① 데이터의 흐름 ② 컴포넌트 구조 ③ 가상 DOM ④ props와 state ⑤ JSX문법 3. Class형 component 구조 알아보기 4. CDN 사용해보기 5. 리액트 사용하며 주의할점! 1. 리액트 탄생배경 - 페이스북(메타)에서 만든 라이브러리 - 넷플릭스, 에어비앤비에서 리액트 사용 - 프론트엔드 3대장 : Angular, vue, react - 지금은 Angular 거의사용안하고, 카카오에서 vue사용 - 데이터 흐름이 양방향인 Angular, vue - 리액트는 단방향의 데이터흐름이다! - 리액트사용전에는 jquery사용함 (DOM 다루는 방식이 쉬워서 가져다 사용함 → 가독성 떨어짐, 유지보수 힘들고..) - 초기 인기 SPA 사례 : g..
 NodeJS - WebSocket, CHAT
목차 1. WEBSOCKET 2. 브라우저에서 사용해보기 3. socket.io 사용해보기 1. WEBSOCKET - 주로 채팅, 좌석예매시스템에 사용되는 새로운 프로토콜 ws:// 을 사용한다. - 브라우저 websocket 내장객체가 있고, NodeJS에서는 ws를 사용 - 외부 라이브러리로 socket.io - server const WebSocket = require("ws"); const wss = new WebSocket.Server({port: 8080}); // 서버실행 == app.listen 과 같아 wss.on("connection", (ws) => { // console.log(ws); // client의 객체정보 접속하는것마다 생성될거임 ws.on("message", (chunk)..
